Kettle And Canyon
  • Blog
  • About Kettle And Canyon
  • Contact Us
  • Blog
  • About Kettle And Canyon
  • Contact Us

                                  New Skills.  Old ways.

  Kettle And Canyon represents my way of life.
​
The kettle references teaching myself to pressure can, learning wild game recipes,
and how to cook all usable parts of an animal. The canyon represents the land where
I am learning to hunt big game and fly fish.

​Kettle And Canyon is  my experience in the Rocky Mountains. 

Bagging Ducks

1/19/2020

0 Comments

 
​My last post (Canning 101) was pretty technical. I wanted to lighten it up today.

A couple year's ago, my friend invited my husband and I to a dinner party. It was at a friend of a friend's house. We had met the people having the party, but didn't really know them. The hosts were incredibly interesting -- the husband was the dentist for a royal family in the Middle East before he retired (I'll call him the "Dentist"). We were invited to this party, in part, because the Dentist knew we were foodies. 

The Dentist, also a foodie, hired a local 4-H kid to raise ducks for him. Where we live, you can't readily buy duck in a grocery store, especially not fresh, wild duck.  So, the dentist found a local kid that wanted to earn some money raising ducks.

We knew the 4-H ducks were on the menu, so we were pretty excited about this dinner. We pulled up to the Dentist’s house, which was in a very nice, upscale neighborhood in a nearby town and I was feeling intimidated. We didn't know the hosts, they were older than us, and I was not very familiar with duck. Right out the gate, the appetizers start flowing. We had shrimp, bacon wrapped dates, and an assortment of cheese. I am not sure I had ever eaten a date until that night.  I was pretty stuffed by the time the appetizers were over.

When it was time for dinner, we all went to the table, which was very formal. The fine china was out and every place setting had a charger. We sat down and the Dentist's wife came out of the kitchen with dinner already plated. She put an entire duck down in front of each one of us. On the drive to the party, my husband and I were talking about whether we would each get our own duck. My husband pointed out that would be completely insane, but I thought there was a chance. Even though I thought it might happen, I was super shocked to see an entire duck on my plate. We were given scissors to cut the duck into pieces, to make it easier to eat. The duck was served rare, which is really important when cooking game.

As we all sat staring at our own ducks, the Dentist explained that the 4-H kid only fed the ducks insects. The ducks never had grains. He also told us that he grew up in the mid-west and his dad was a duck hunter. He explained that every Sunday evening, his family had duck that his dad had shot that day. Duck was important to the Dentist and getting duck where we live was a labor of love. He graciously shared his most prized food with us and it was delicious.

As we were finishing the night, my husband had the guts to ask the Dentist if he could take his duck carcass home to make stock. I almost kicked him under the table. Luckily, the Dentist was flattered and offered to allow us to take all of the ducks with us. This posed an interesting question: how does one transport six duck carcasses without preparing ahead of time? We did not have special Tupperware, a cooler, not even a box. Although, I am not sure how you are supposed to take duck carcasses home from a dinner party.

So, we left the dinner party in the mansion with a trash bag filled with six discarded duck carcasses. I was absolutely mortified. It looked like a scene straight out of the Beverly Hillbillies.  

In hindsight, my husband was right to snatch up the duck – the stock was unbelievable. And, because we took every duck at the table, we had stock for a year. 

It was also a really important lesson in how I have had to re-frame what is acceptable when I am thinking about food that doesn't come from a grocery store. I thought the duck carcasses were trash and the Dentist planned to throw them away. Once my husband asked to take the carcasses, the trash became usable food. 

We live in a rural, rugged area where the nearest Whole Foods is four hours away, over mountain passes and through numerous reservations. There is no Trader Joe’s. We don't have one-hour Amazon Prime delivery. In reality, “two day” delivery sometimes takes six days.

Having access to high quality food is a huge reason that I have embraced this lifestyle. Because my husband took the duck carcasses, we were able to make stock, use a part of the animal that would have otherwise been thrown away, and had access to food that we could not buy in the grocery store.
​
We wanted great food, so we have learned how to source it ourselves. We used the duck stock in dishes for an entire year. One of the best uses was paella. Here is our recipe:
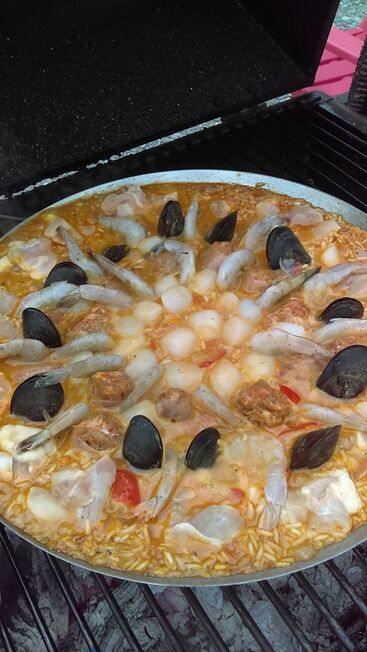
PicturePaella on the grill. This is when you need to close the lid and stop stirring.

​Paella

This is an old-world recipe in the sense that you can be very flexible with ingredients -- it is to taste and availability. This recipe is for a 14" paella pan.
 
Ingredients:
2 c. Long grain white rice
1 tablespoon garlic
Olive oil
1 red bell pepper julienned 
1 quart of stock (may need 2 quarts depending on altitude, cooking time, etc.)
1 bottle of dry white wine
1 minced red onion
2 tablespoons paprika
1 tablespoon red chile
Salt and pepper to taste
4-6 oz. of each: cubed de-boned chicken, cut sausage links, scallops, raw shrimp, clams/mussels/squid (depending on what is available)
 
1. Pre-heat grill. Prep all ingredients before you begin cooking. 

2. Place the paella pan on the grill, add rice and 1 tablespoon of garlic with 1 tablespoon of olive oil. You want to toast the rice until there is a little char. Constantly stir to ensure the rice does not stick to the pan throughout the cook time.

3. Add red bell pepper and sauté. 

4. Begin adding stock to the rice. Constantly keep the rice wet throughout the rest of the cook time. If the rice is dry at the top, add liquid. Alternate stock and white wine.

5. Add minced red onion.

6. Season with smoked paprika, red chile powder, and salt and pepper. Traditionally, paella requires saffron. But, saffron is very expensive and not available where I live. We substitute paprika and chile powder.

7. Once the rice is about 60% cooked, add meat. Push the meat into the rice in a circular pattern. (Ring of chicken, ring of sausage, etc) All meat goes into the paella pan at the same time. Once the meat is added, stop stirring. Close the lid to the grill.

8. Check on the paella to ensure it is not burning. Add stock and wine to ensure the top of the paella is wet. 
​
9. Paella is done when you see that all ingredients are fully cooked. Make sure the chicken is cooked fully by visually inspecting it. There will be a crust at the bottom of the paella once it is done. That is a good thing.
 
When you serve the paella, scoop it from the outside in as if you are serving a piece of pie. Add tabasco (tabasco is best because it is a vinegar based hot sauce).
 
Total cook time: about 1 hour 15 minutes


0 Comments

Canning 101

1/14/2020

0 Comments

 
I started canning because I wanted to reduce my use of aluminum cans and make some of my own food. Let's be honest, I am also really terrible at remembering to buy stock at the grocery store. Before I started canning, I would often have to run to the grocery store mid- recipe. And, when you live in the rural Rocky Mountains, "running to the store" is an 80 mile round trip excursion. So, I started making my own. 

The thought of using a pressure canner was absolutely terrifying to me in the beginning. However, due to my elevation (7,000 feet), it was by far the safest option. A pressure canner can be used to preserve/can food and can also serve as a pressure cooker. This is not, however, an Instapot. 

For some of you, the idea of a pressure canner may conjure images of explosions in your great-grandmother's kitchen. That is a fair position. And, the reason it is very important to follow updated processes and recipes. I strongly discourage using old recipes as food safety standards have evolved.

Equipment:
You will need to make an investment up front to be able to can your own food. However, you will see the outcome is absolutely worth it. 

I bought the Presto 23-quart canner years ago and it works like a charm. You can get it on Amazon for less than $80:

www.amazon.com/Presto-01781-23-Quart-Pressure-Canner/dp/B0000BYCFU/ref=sr_1_1?keywords=pressure+canner&qid=1579025461&sr=8-1
Picture
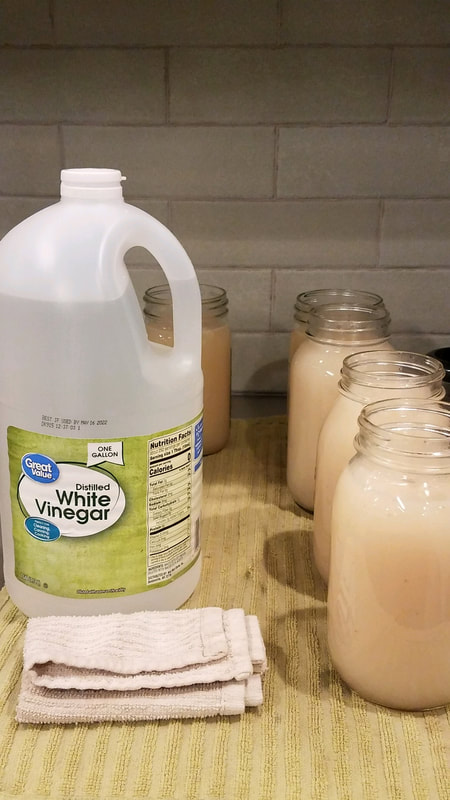
In addition to a pressure canner, you will need:​
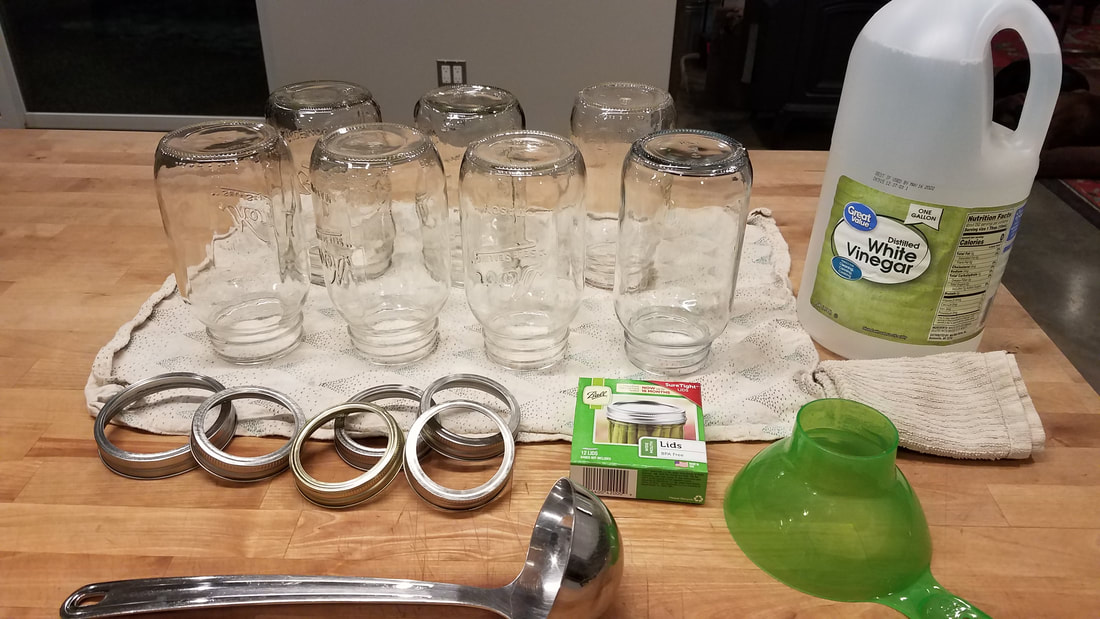
  • Jars (I prefer wide-mouth)
  • Lids and rings (will be included with first jar purchase)
  • Vinegar
  • Jar lifter (to remove hot jars from pressure canner)​
  • Funnel (trust me on this one)
  • Ladle 
  • Clean dish cloth

Prep:
​Before you start canning, you need to sterilize your jars. Most people do that by running the glass jars through the dishwasher. Ideally, you will take the warm jars right out of the dishwasher and fill with your food to be canned. 

You also need a clean surface to prep. 
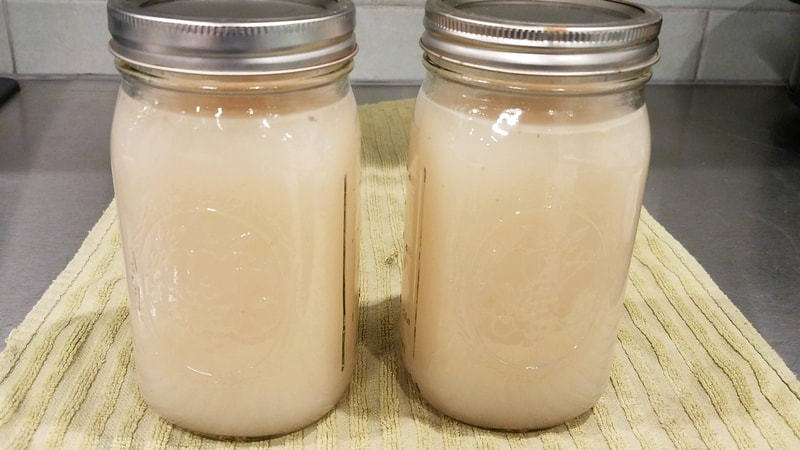
PictureChicken stock after 7 days in crock pot.
Recipe:
Great, so you have bought a bunch of random supplies, but what are you going to make? Let's start with stock.

​ I suggest beginning with stock for a few reasons: 1) you make it in a crock pot and it takes little work, 2) stock is extremely useful, and 3) you probably have what you need in your kitchen.

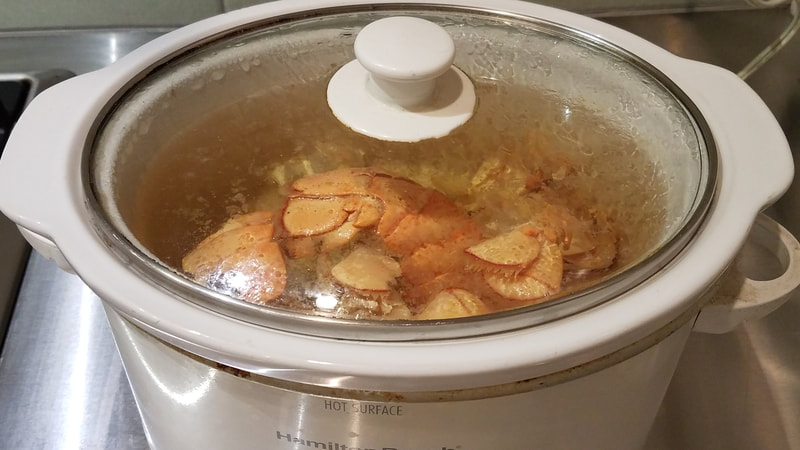
Stock is super easy to make. Just put bones in a crock pot and add water. Keep it on low for days. I try to keep mine going for a week before I can. Keep adding water to the crock pot as it evaporates. The longer you keep the stock going in the crock pot, the richer your stock will be. You can use bones from any animal: chicken, venison, elk, pork, etc. This is a way to take control of what you eat. For example, do you want organic stock? Use organic bones. Are you trying to decrease your sodium intake? Home-made stock is so much lower in sodium that the store bought brands. 

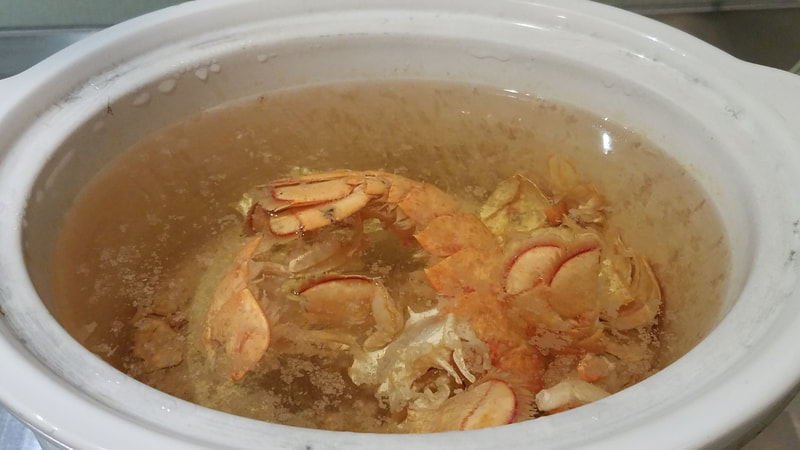
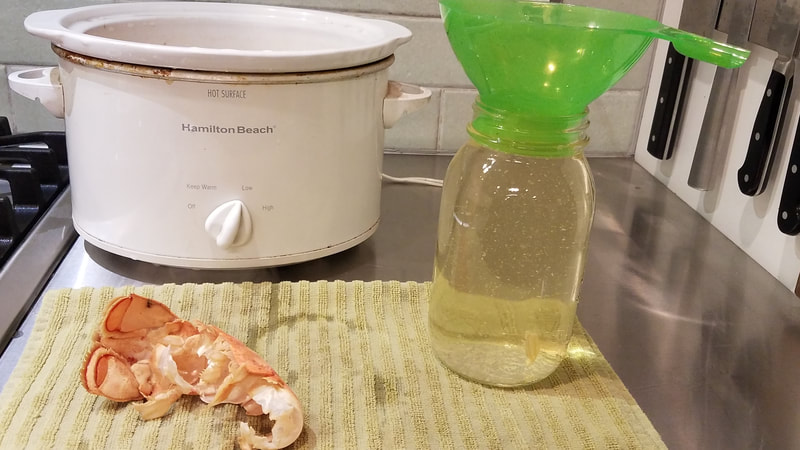
Every New Year's Eve, we have lobster or crab legs. Every January 1, I start a seafood stock. I do not suggest using seafood stock for everyday meals. We use it for paella because it does have a strong seafood flavor.
​​​
Picture
Canning:
Now you have your supplies, you have spent a week adding water to a crock pot, let's fill the jars with delicious goodness. 
​
As a tip, I will often turn on the stove and start boiling water in the pressure canner before I fill the jars. I am impatient and do not want to wait for the water to boil in the canner after the jars are filled.

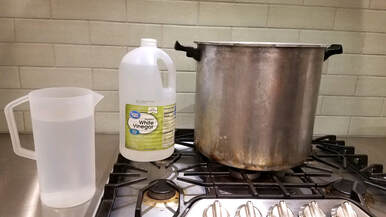
I fill the pressure canner with about a liter of water and add a splash of vinegar. The vinegar is to prevent your jars from looking cloudy. Let the water boil in the pressure canner with the lid off as you prep the jars. Once the canner is filled with the jars, you want to be sure there is at least 3 inches of water in the bottom of the canner. You can add more water once the jars are in the canner.

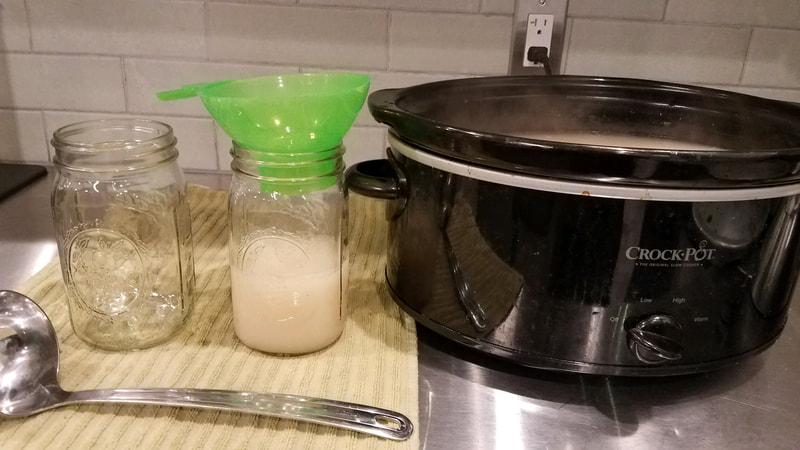
Using your ladle, fill the jars with hot stock out of the crock pot. Do not over-fill your jars.Once the jars are filled, you will want to wipe the rim of each jar with a cloth dipped in vinegar. This ensures you will have a clean seal. 

Next, place the lids inside the rings and screw on the lid. You do not want to over-tighten the jars. ​
Picture
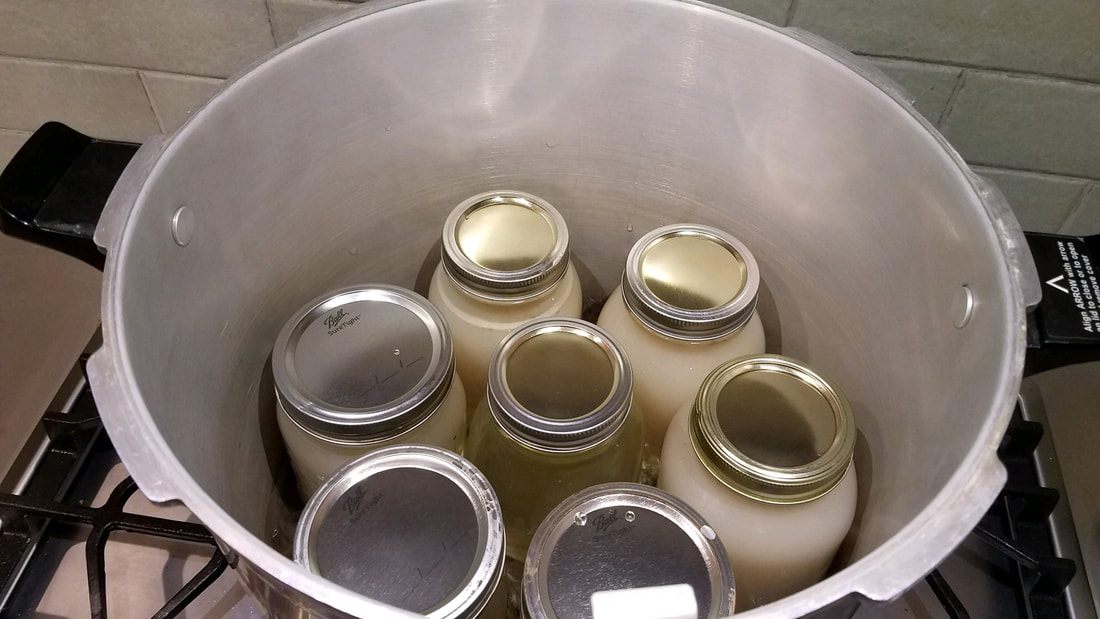
Now we are ready to put the jars into the pressure canner. You want to leave a little space between each jar. Your pressure canner will explain how many jars it can accommodate. My pressure canner can handle 7 quarts at a time.

Picture
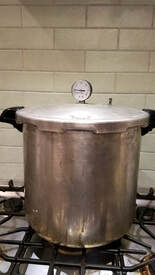
It is very important to check the lid of your pressure canner before every single use.  Look through the steam valve to be sure you can see through it and it is not clogged. (The valve is the spout coming out of the lid that the weighted gauge will eventually cover.) The steam valve can become blocked, which is very dangerous. Once you have checked that the valve is clear, you are good to put the lid on the pressure canner.

You need to allow steam to flow steadily out of the steam valve before you add the weighted gauge. This will take a few minutes. Once you can visibly see steam coming out of the gauge (located to the right of the dial in this photo), you can put the weighted gauge on the pressure canner. 

Once you add the weighted gauge (the little metal piece that rocks), the pressure will begin to build in the canner. The PSI (number on the gauge) and cook time will vary drastically depending upon your elevation and what you are canning. I always check the National Center for Home Food Preservation or the Ball Complete Book of Home Preserving for cook times and PSI.

For quarts of meat stock in a weighted-gauge pressure canner, you need PSI of 10 if you are under 1,000 feet in elevation and PSI of 15 if you are over 1,000 feet. I can almost everything at PSI 15. This means that you wait until the dial reaches 15 before you start your cook time.

For quarts, you will maintain the PSI at 10 (if under 1,000 feet) for 10 minutes. If you are above 1,000 feet in elevation and canning at 15 PSI, you will cook for 15 minutes. Once time is up, turn off the stove. DO NOT open the pressure canner until the PSI is at 0 and the pressure is gone from the canner. If you open prematurely, the jars can explode and all of your work is ruined. 

Once the pressure is out of the canner, remove the jars with the jar lifter. Place the jars onto a heat safe surface on a dish towel. Do not allow the jars to touch one another. Over the next few hours, you will hear the jars popping. That is okay. Once the jars are cool, push each lid to make sure it is solid. If it pops, you will need to use it within a few days and refrigerate it, as you do not have a good seal.

So, this sounds like a really long involved process, but it really is simple. The first time will take you longer, but by the second or third time, this is a breeze. I can while I am meal prepping, doing laundry, watching TV, etc.
​
Happy canning, friends!

0 Comments

The fair queen.

1/10/2020

5 Comments

 
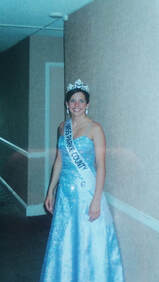
PictureFair queen, c. 2003
In 2003, I was a county fair queen, with a little red car, and a lot of makeup.  I grew up in a small town, and although it was a farming community, my family did not even have a garden. Culturally, food was not important to me and I never questioned the source of my food. My parents did not can, hunt, or fish. 

I had friends whose parents hunted and fished. I did not understand that lifestyle. Honestly, I thought that people that hunted and fished did it out of necessity, not out of choice. I thought game meat was "dirty" and unappetizing, although I do not recall ever actually eating it.

Years and many miles later, I realize that I was wrong. Really wrong. In the past ten years, some of the most incredible meals that I have eaten included wild game. 

After college, I planned to go to graduate school in Miami. But then the University of Denver gave me a scholarship. I packed my two wheel drive SUV and headed to Colorado with the firm intention of never staying longer than three years. I did not own a proper winter coat or weather proof boots.

I met my husband in graduate school and we started working in Denver after graduation. He is from the southwest and I decided to stay in Colorado. I had no idea where that decision would take me. During one trip to visit his family in New Mexico, I saw a sign warning of animals in the area. I literally asked my husband, "What is that animal that looks like a bear with antlers?" That, my friends, was an elk.

Due to the recession, wanderlust, and a desire to leave Denver, we quit our jobs and moved to the mountains. While talking about the move, my husband warned that our new neighborhood might have bears, mountain lions, or other predators that could require me to shoot a gun. I insisted a) that was completely untrue, b) he was trying to scare me, and c) I would never shoot a gun. Much to his delight, we had a bear in our front yard within the first week. I had never seen a bear in real life. It smelled absolutely awful (think about a sweaty person living in a fur coat for years). Throughout our first fall, the bears came within feet of our open bedroom window every weekend.

My husband started elk hunting. I had no idea this was something that interested him and I certainly wanted no part in it. He would wake up in the dark in the freezing November temperatures, armed with a gun, and head off for the mountains. I was terrified that he would shoot himself or get lost in the wilderness. In hindsight, my position was reminiscent of The Christmas Story ("you'll shoot your eye out!"). 

During his first hunt, he shot an elk. He returned to our house well after dark, covered in blood and looked like he had just murdered someone. I was not impressed. Only now do I realize how difficult it is to track and stalk an elk in the snow. Only now do I understand how physically grueling it is to hike for hours in high altitude conditions. 

Since the beginning of my husband's elk hunts, I always helped him process the animals. Holding a bloodied elk quarter in the kitchen while wearing my college sweatshirt was a big wake-up call for me. I had never seen an elk (alive or dead) and now I was helping my husband process one. 

While he was learning his new hobby, I decided to learn how to can. Remember, I had absolutely zero family members teaching me how to do this. I  was all on my own, armed with the internet and a subscription to Mother Earth News. I was terrified (for good reason) that I was going to poison us. 

I tried lots of recipes: chicken/lamb/venison/elk stock, tomatoes, red chile pinto beans, Anazai beans, lamb stew, raw chicken, jalapeno jam, strawberry lemonade, bruschetta, apple butter, apple sauce, salsa, Asian plum sauce, giardineria. The giardineria was exceptionally terrible.

I also started cooking wild game and have learned quite a bit along the way. For example, elk ribs must be cooked in a very specific manner. Elk ribs are not pork ribs. I have rendered elk fat to make pies and made more venison stews that I can count. 

Eventually, I started to go with my husband on his elk hunts. 2019 was the first time that I took an active role in the hunt. In November, we went on a 5 day elk hunt in the Rocky Mountains. My husband's tag was in a difficult unit, characterized by deep canyons and steep mountains. We utilized a hunting app that was a real life saver! (More on that later.)

He bought me my first pair of binoculars for this hunt. Armed with a backpack filled with layers of clothing, snacks, water, gloves, hand warmers, first aid supplies, oh - and the binoculars, we headed out into the dark, cold November morning to find an elk. 

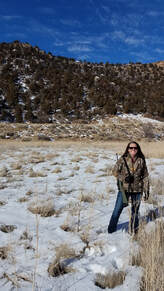
PictureRabbit hunting, c. 2020
On our first day, we hiked for hours, descended 55 flights of stairs and climbed 38, through the tough terrain. Our hunt was at about 7,000 feet in elevation. We hiked, looked at maps, and had a whisper fight about the strength of his rifle.  And, I got "buck fever." 

Within weeks, I completed hunter safety, started shopping for a gun, and began researching hunts.

​
​This is my story in the Rocky Mountains. Welcome to the journey! 

5 Comments

    About Beth

    From no experience in the outdoors and few culinary skills to big game hunting and rendering elk lard, this is my journey.

    Archives

    March 2023
    February 2023
    February 2022
    October 2021
    September 2021
    August 2021
    July 2021
    April 2021
    November 2020
    October 2020
    July 2020
    May 2020
    April 2020
    March 2020
    February 2020
    January 2020

    Categories

    All

    RSS Feed

Powered by Create your own unique website with customizable templates.